- What a background remover is and how AI segmentation works
- Transparent PNG vs white / black backgrounds
- File formats that support transparency (PNG, WebP)
- Hard edge vs soft edge cutouts and alpha matting
- Resolution requirements for clean edges
- Tips for hair, fur and fine details
- Common problems: fringing, holes, floating look
- Manual vs AI removal and when to use each
- Photography tips for easy removal
- E-commerce requirements (Amazon, Shopify, eBay, Etsy)
What is a background remover?
A tool that isolates your subject by cutting out the subject and deleting everything behind it.
A background remover is software or a web-based tool that detects the main subject of an image — a person, product, animal or logo — and deletes everything surrounding it. The result is a cutout on a transparent, white or black background.
Modern background removers use artificial intelligence. A neural network trained on millions of images analyzes every pixel and classifies it as foreground or background. This is called semantic segmentation. More advanced models also perform alpha matting, which assigns a partial transparency value to edge pixels — essential for hair, fur and semi-transparent details.
The AFFLIGO Background Remover uses client-side AI processing. The AI model runs entirely in your browser — your image never leaves your device. Upload a JPG, PNG or WEBP image and the model removes the background in seconds. You can export a transparent PNG or place the subject on white or black.
AI detection
The model finds the main subject by analyzing edges, colors and textures across the entire image.
Segmentation
Every pixel is classified as foreground or background. Edge pixels get special treatment for smooth results.
Export
Download as transparent PNG for design, or solid white/black for marketplace listings and profiles.
Why background removal matters
A busy background pulls attention away from the subject — and slows down anyone who has to mask by hand.
Product photos on marketplaces often need a pure white or transparent background. Corporate headshots look more consistent on a solid color. Designers need clean cutouts for composites, stickers and social overlays. Manual masking in Photoshop works, but it is slow when you have dozens of SKUs or a batch of team photos.
AI background removers cut that time to seconds. They are not perfect on every image, but for clear subjects and reasonable contrast they produce usable transparent PNGs or solid-color results without drawing paths by hand.
Listings with clean backgrounds also look more consistent across a catalog. Buyers focus on the product instead of a cluttered desk or random wall. That consistency is one reason marketplaces push white-background rules for main images.
The same idea applies to team pages and speaker bios. A grid of headshots on the same solid color looks intentional. Mixed office walls and outdoor backgrounds look accidental. Removing and replacing the background is the fastest way to get that consistency without a studio reshoot.
E-commerce
White or transparent product shots for Amazon, Shopify and catalogs.
Portraits
Consistent headshot backgrounds for teams and profiles.
Design & social
Cutouts for stories, thumbnails, stickers and composites.
Print-on-demand
Clean edges for apparel, mugs and stickers without white halos.
How AI background removers work
The pipeline is detection, segmentation, edge clean-up, then export. Knowing the steps helps you debug bad results.
The model first finds the main subject — person, product, animal or object. It then classifies pixels as foreground or background (semantic segmentation). Edge refinement improves hair, fur and fine detail. Some tools also try to handle semi-transparent areas like glass or smoke, though those remain difficult.
After separation you get a cutout. You can keep transparency (PNG) or fill with white, black or another color. The AFFLIGO Background Remover follows this pattern: upload, process, download transparent or solid-background output.
Results depend on the input. High contrast between subject and background, sharp focus and decent resolution help. Low contrast, heavy blur and crowded scenes cause more errors.
Shadows and reflections are often removed with the background. That can make a product look like it is floating. If you need a natural sit-on-surface look, add a soft shadow later in a design tool.
Edge quality varies by subject type. Smooth product silhouettes are easier than flyaway hair or fur. Overlapping people, hands holding objects, and thin straps are common failure points. When the automatic mask is close but not perfect, a short pass in any image editor is usually enough — full manual pen-tool work is rarely needed anymore for straightforward photos.
Output options compared
Choose the export that matches the next step in your workflow.
| Output | Best for | Notes |
|---|---|---|
| Transparent PNG | Design, web overlays, POD | Keeps alpha; place on any background later |
| Solid white | Marketplace listings | Common requirement for product photos |
| Solid black | Creative / high-contrast | Useful for certain social and print looks |
For Amazon-style listings, pure white (RGB 255,255,255) is the usual target. For design work, transparent PNG is more flexible because you can drop the subject onto any scene later.
Always check platform rules before bulk exporting. Some require pure white with no shadows; others allow lifestyle images on secondary slots. Match the main image to the strictest rule you need to pass.
Step-by-step removal
Drop the photo, let the model cut the subject, pick transparent or white, download — most images take under a minute.
Open the tool
Go to the AFFLIGO Background Remover. No account is required for a standard remove. The page works in modern desktop and mobile browsers.
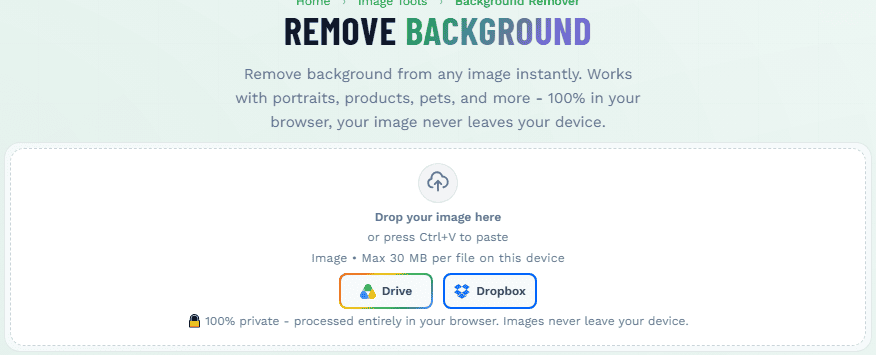
Upload the image
Use a clear photo of the subject. Higher resolution and stronger subject/background contrast improve edges, especially around hair. JPG, PNG, and WEBP up to 30MB are accepted — single file only. Avoid heavy filters and extreme compression when possible.

Process
Run removal. Review the preview at a large size, not only as a thumbnail. If edges look soft or incomplete, try a sharper source image or a different crop that isolates the subject. Re-running the same soft photo rarely fixes fundamental contrast problems.

Choose output and download
Download transparent PNG for design, or set white or black for listings and profiles. Check the file at 100% zoom before publishing. If the platform needs a minimum pixel size, resize after removal so edges stay sharp.

Tool comparison table
A practical look at common online options. Features change; check current plans before relying on batch or API.
| Feature | AFFLIGO | remove.bg | Canva | PhotoRoom |
|---|---|---|---|---|
| Free use | Yes | Limited free | With plan limits | Limited free |
| Hair / fine edges | Very good | Excellent | Good | Very good |
| Product photos | Strong | Strong | Good | Excellent focus |
| Transparent PNG | Yes | Yes | Yes | Yes |
| BG replace (white/color) | Yes | Yes | Yes | Yes |
| Batch | Check tool | Yes (paid tiers) | Limited | Yes (plans) |
| Best fit | Quick free cutouts | Portraits, pro edge quality | Design in one app | E-com product pipelines |
For one-off free removals, AFFLIGO or similar free tools are enough. For high-volume catalogs or the absolute best hair detail, paid tiers of specialized tools may be worth testing on your own sample images.
Run the same three test images (one portrait, one product, one hard hair case) through any tool you evaluate. Side-by-side comparison beats marketing claims.
Pricing and free limits change often. What matters for most users is whether everyday single-image removal is free, whether the edge quality is good enough for your subject type, and whether you can export transparent PNG without a watermark. Batch and API matter mainly for agencies and large catalogs.
Tips for better results
Input quality drives output quality more than any single tool brand.
Contrast
Subject should stand out from the background. Similar colors cause holes and fringing.
Resolution
Start with a reasonably large image. Tiny or heavily compressed JPEGs lose edge detail.
Hair & fur
Busy backgrounds behind hair are hardest. Plain backdrops and good lighting help a lot.
Products
Shoot on a plain surface when you can. Avoid strong reflections on glass and metal if possible.
If hair edges look wrong, try a tighter crop around the subject or a different photo with a simpler background before spending time on manual fixes.
For products, remove dust and glare in the original shot when you can. AI will try to keep reflections on shiny packaging; sometimes that helps realism, sometimes it looks like a smudge. Judge on a large preview.
If you shoot products yourself, a simple white or light grey backdrop and even lighting will beat any AI fix on a chaotic kitchen-counter photo. The remover still helps, but the cleaner the start, the fewer edge repairs later.
Use-case workflows
Same tool, different export choices. Match the file to where it will appear.
| Workflow | Recommended output | Notes |
|---|---|---|
| Marketplace product | Solid white | Match platform rules; consistent lighting across SKUs |
| Website / design | Transparent PNG | Place on any page or ad background later |
| Team headshots | Solid brand color | Same color for every person for a uniform grid |
| Social stickers / stories | Transparent PNG | Drop onto stories, reels or memes |
| Print-on-demand | Transparent PNG | Check edges at print size; avoid white halos |
If you publish the same product on multiple marketplaces, keep one transparent master PNG and generate white or branded versions from it. That avoids running AI removal twice on the same photo. The same flow covers ID use cases like passport photos (white fill, then verify against your country's rules) and ink signatures cut out on transparency for documents.
Common problems and fixes
Most failures have a simple cause in the source image. Fix the photo when you can; only then switch tools.
Switching tools on a bad photo sometimes helps a little because models differ, but it does not invent detail that was never in the file. Resolution, focus and contrast are still the foundation. I once tried cutting out a curly-haired portrait shot against a busy café wall — the model kept slivers of wall between the curls, and no setting fixed what a plain backdrop would have prevented.
| Cutout problem | Likely cause | What to try |
|---|---|---|
| Jagged or missing hair | Busy bg, low res, motion blur | Higher-res photo, plain backdrop, tighter crop |
| Holes in the subject | Low contrast with background | Better lighting; avoid clothing similar to bg color |
| White halo around edges | Soft matte or residual fringe | Slight erode in an editor, or re-export with different tool settings |
| Floating look (no shadow) | Shadow removed with background | Add a soft drop shadow in design software if needed |
| Glass / reflections wrong | Semi-transparent materials | Expect limits; manual touch-up may still be needed |
Privacy notes
Upload-based removers bill per image and keep your photos on their servers — what changes when the neural net runs inside your tab instead.
The AI model runs locally in your browser using WebAssembly. Your image data is never sent to any server. The model downloads once (~4.7 MB) and is cached by your browser for instant subsequent use.
For truly sensitive images, browser-based tools like AFFLIGO offer the strongest privacy guarantee — your files never leave your device under any circumstances.
Team headshots and customer photos should follow your privacy policy. Get consent when required and do not leave full-resolution faces in public temp folders.
If you process photos for clients, clarify in your workflow whether files may pass through an online tool. Some contracts require local-only processing for personal data.
Best practices
A short checklist before you batch a whole catalog. One good process beats fixing fifty bad cutouts later.
Shoot with removal in mind
Plain backgrounds and clear subject separation save time later. A white or grey seamless is ideal for products.
Use adequate resolution
Do not start from a tiny social-media download if you need print or zoom quality. Prefer the original camera file when you have it.
Pick output for the destination
White for marketplaces, transparent PNG for design, brand color for team grids. Export once per destination instead of reusing a compromise file.
Spot-check at 100% zoom
Especially hair, product edges and any text on packaging. Fix or reshoot problem cases. One bad edge on a hero image is more costly than an extra minute of review.
FAQ
Common questions about online background removal.
AI models detect the subject, classify pixels as foreground or background, refine edges, and export a transparent PNG or solid-color cutout. The quality of the result still depends heavily on the source photo.
Yes. Most tools, including AFFLIGO, allow transparent PNG or solid white or black after removal.
Modern AI handles hair better than older tools, but busy backgrounds and low contrast still cause fringing. Higher resolution and clear subject contrast help. For critical portrait work, compare two tools on the same image before committing a whole batch.
Many tools offer free single-image removal. Batch, higher resolution and commercial API use are often paid. AFFLIGO aims at free everyday use. Always check the current free limits on any site before planning a large project around them.
Usually low contrast between subject and background, or colors that look similar. Improve lighting and separation in the source photo.
Yes for creating white-background images. Always confirm current Amazon image requirements (pure white, size, margins) before uploading. Secondary images can often be lifestyle shots with natural backgrounds.
Often no for clear subjects. Complex hair, glass or overlapping people may still need a quick manual clean-up in any editor. AI is the first pass, not always the last.
The transparency is fine — some viewers and apps render transparent pixels as black instead of a checkerboard. Open the same PNG in a browser or editor to confirm. If you need a guaranteed background, re-export the cutout on solid white before sharing.
Download PNG — this tool exports transparency as PNG only. WebP also supports transparency elsewhere, but JPG flattens it to white, so never pick JPG for a cut-out.
Open the AFFLIGO Background Remover, upload one JPG, PNG or WEBP image up to 30MB, click Remove Background, then download the transparent PNG. It runs entirely in your browser with no signup and no watermark.
Yes. Logos and ink signatures on plain white cut out cleanly — download transparent PNG and reuse it on any design. Start from the highest-resolution original; the output is raster PNG, not vector, so tiny sources will look soft when enlarged.
File formats for transparency
Not every format can store a transparent background. Choose the right one.
| Format | Transparency | Best for | Notes |
|---|---|---|---|
| PNG | Yes | Logos, product cutouts, design assets | Universal support; larger file size |
| WebP | Yes | Web delivery, social media | Smaller files than PNG; 97%+ browser support |
| JPG | No | Photographs on solid backgrounds | Fills transparent areas with white |
| GIF | Yes (1-bit) | Simple graphics, animations | Only 256 colors; not for photos |
After removing a background, always save as PNG to preserve transparency. JPG does not support alpha channels — it will replace the transparent area with a solid color (usually white), defeating the purpose of the removal.
For web use where file size matters, WebP is a strong alternative. It supports transparency with smaller file sizes than PNG and is supported by all modern browsers.
Hard edge vs soft edge cutouts
Different subjects need different edge treatment.
A hard edge cutout is a clean, sharp boundary between the subject and the transparent background. This works well for products with defined geometric shapes — boxes, bottles, electronics, furniture.
A soft edge cutout preserves semi-transparent areas where the subject gradually fades into the background. This is essential for hair, fur, feathers, smoke, lace and fabric edges. Without soft edge handling, these areas look blocky or get cut off entirely.
Alpha matting is the technique that makes soft edges possible. Instead of a binary keep-or-remove decision for each pixel, alpha matting assigns a transparency value (0 to 1) to edge pixels. This often produces visibly smoother hair rendering than simple binary masks.
When reviewing a cutout, zoom in on the edges — not the center of the subject. That is where quality differences between tools are most visible.
What is fringing and how to fix it
A thin border of the old background color around your subject.
Fringing (also called a halo or edge contamination) happens when pixels from the original background color bleed into the edge of the cutout. It is most visible when you place the cutout on a background that contrasts sharply with the original.
Common causes:
- Subject and background have similar colors or brightness
- Low-resolution source image with fewer edge pixels
- Soft focus or motion blur at the edges
- Strong colored lighting reflecting from background onto subject edges
How to reduce fringing:
Use a higher-contrast source
The best fix is a source photo where the subject clearly stands out from the background in both color and brightness.
Test on multiple backgrounds
Place the cutout on white, black and a saturated color. Halos that disappear on one background become obvious on another.
Manual cleanup in an editor
For critical images, open the PNG in an editor and paint over the fringe area on the layer mask with a small soft brush.
Resolution and quality requirements
More pixels give the AI more information for cleaner edges.
Background removal models work at a fixed internal resolution. When you feed them a large, sharp image, the model has plenty of pixel data to make accurate edge decisions. When the source is small or blurry, every ambiguous edge pixel becomes a jagged artifact in the output.
Minimum recommended resolutions:
| Use case | Minimum longest side | Ideal longest side |
|---|---|---|
| Social media | 800 px | 1200 px |
| E-commerce listings | 1000 px | 2000 px |
| Print materials | 2000 px | 3000+ px |
| Professional composites | 2000 px | 4000+ px |
Start with the highest-resolution original you have. Removing backgrounds from small images and upscaling later produces poor results. It is better to remove from full resolution and downsize afterward.
Handling hair, fur and fine details
The universal challenge for every background removal tool.
Hair and fur are the hardest subjects because individual strands are semi-transparent and blend gradually with the background. A hard mask cuts them off. Alpha matting computes per-pixel opacity to preserve individual strands.
Tips for better hair and fur results:
Contrast is key
Shoot against a background that is clearly different in color from the hair. Blonde hair against a dark backdrop works better than blonde against beige.
Even lighting
Soft, diffused light without harsh shadows helps the AI detect the hair boundary. Avoid backlighting that creates rim light on hair edges.
Tighter crop
A simpler background behind the head means fewer confused edge pixels. Crop out busy areas around the hairline.
Use the soft brush
If manual cleanup is needed, use a soft-edged brush on the mask along the hair boundary. A hard brush creates an unnatural pasted-on look.
For pet photos, the same principles apply. Fur benefits from a contrasting backdrop and even lighting. Tools with specialized animal detection produce better results than general-purpose removers.
Batch background removal
Process many images at once for e-commerce catalogs and large projects.
Batch background removal processes multiple images automatically in one session. Instead of uploading each image individually, you select a folder or group of files and apply the same removal settings to all of them.
This is critical for e-commerce sellers with hundreds of product photos, photographers delivering galleries, or marketing teams preparing image libraries. Manual masking at 15 minutes per image would take 125 hours for 500 products. AI batch removal finishes in under 30 minutes.
When batch processing, always:
- Photograph consistently — same lighting, same distance, same background color across all products
- Test with 3-5 sample images first before processing the entire batch
- Spot-check 10% of the batch for consistent quality
- Keep transparent PNG masters — generate white or colored versions from the master
The AFFLIGO Background Remover processes one image at a time in your browser — upload, remove, download, then repeat. For API-driven bulk workflows, tools like Remove.bg API or Photoroom bulk upload are alternatives.
Manual vs AI removal
AI handles 90% of cases. Manual tools handle the remaining 10%.
| Factor | AI removal | Manual removal |
|---|---|---|
| Speed | 2-5 seconds | 5-30 minutes per image |
| Skill required | None | Intermediate to advanced |
| Best for | Products, portraits, clean backgrounds | Hair, glass, transparent objects, print work |
| Edge quality | Good for 90% of subjects | Pixel-perfect on complex edges |
| Cost | Usually free or low-cost | Photoshop subscription or free (GIMP) |
| Batch processing | Supported by most tools | Not practical for large volumes |
Start with AI. If the result is good enough for your use case, you are done. If edges look rough — especially around hair, fur, glass or overlapping people — switch to a manual tool like Photoshop's Select and Mask workspace for refinement.
The hybrid workflow is the professional standard: AI for the first pass, manual refinement for the last 10% of edge quality. This is 15-30x faster than starting from scratch with the Pen Tool.
Photography tips for easy removal
The best background removal starts before you press the shutter.
Shooting with background removal in mind dramatically reduces post-production time. The quality of your input directly determines the quality of the cutout.
Use a contrasting backdrop
A backdrop that differs clearly from the subject in both color and brightness gives the AI the clearest possible signal. White, grey or colored seamless paper works well.
Light the subject separately from the background
Even lighting on the subject with a slightly darker or evenly lit background prevents shadows from the subject falling on the backdrop, which creates edge ambiguity.
Fill the frame
Small subjects in large images reduce the effective resolution for segmentation. Get closer or crop tightly around the subject.
Keep the background clean
Even if the background is not solid, a simple non-distracting environment reduces the complexity of the segmentation task and minimizes errors.
Shadow handling after removal
Add shadows to ground your subject on a new background.
By default, most background removers treat shadows as part of the background and remove them. This works for clean e-commerce product shots. But when you place a cutout on a new background without a shadow, the subject can look like it is floating.
Adding a subtle shadow creates depth and makes the composite look natural. Two common shadow types:
Drop shadow
A soft, semi-transparent copy of the subject placed behind and offset. Works well for product photos and portraits on solid backgrounds.
Contact shadow
A small, dark area at the base of the subject where it meets the surface. Creates the impression the subject is sitting on a surface rather than floating.
Design tools like Canva, Figma and Photoshop offer built-in shadow effects. Some AI tools now automatically suggest the best shadow placement based on the perceived light source in the original photo.
E-commerce requirements
Marketplaces have strict rules for product photos. Follow them to avoid rejection.
| Platform | Main image background | Other rules |
|---|---|---|
| Amazon | Pure white (RGB 255,255,255) | Product fills 85%+ of frame; no text/logos on main image |
| Shopify | White or transparent | Consistent style across catalog; 2048x2048 recommended |
| eBay | White or light grey preferred | Minimum 1600px on longest side for zoom |
| Etsy | No strict rule; white recommended | First photo should show product clearly; 2000x2000 ideal |
| Walmart | Pure white (RGB 255,255,255) | Minimum 2000x2000; square aspect ratio |
Always check the platform's current documentation before uploading. Rules change and enforcement varies. The safest approach: create a transparent PNG master, then generate platform-specific white-background versions from it.
After removing the background, ensure the product fills the frame appropriately. A tiny product surrounded by white space looks poor in search results. Crop or resize after removal so edges stay sharp.
Key Takeaways
- High-contrast images with solid backgrounds give the best automatic removal results
- Hair and fur edges are the hardest to remove — use tools with alpha matting for portraits
- Always download as PNG for transparency — JPG does not support transparent backgrounds
- E-commerce platforms (Amazon, eBay) require white backgrounds — use solid color fill after removal
- Remove before resizing — small images lose detail when the background is stripped
- Shoot new product photos on a plain backdrop — ten seconds of setup beats ten minutes of edge cleanup
I ran a portrait photo and a product shot through the remover: hair edges came out smooth with the edge refinement working, and the model loaded once then processed the second image without re-downloading. A low-contrast gray-on-gray image left a halo — solid backgrounds still work best.
Sources: U²-Net salient object detection paper, ONNX Runtime Web docs, model behavior checked Aug 2026.

Karan Kumar


