- Set the pixels the target asks for, not what your camera shot. 1080x1350 for an Instagram post, 1200x675 for X, 200x230 for a bank form, 1200x1800 for a 4x6 inch print at 300 DPI.
- Then there is one lever for file size: JPEG quality. In our tests, dropping 90 to 80 took a 1080x1350 post from 138KB to 93KB. Below 70, edges start to smear.
- A small pixel count cannot reach a large KB minimum. A 200x230 photo peaks around 14KB at quality 100, so a form that demands a 20KB floor rejects it no matter what you do.
What resizing actually changes
Four operations get called "resize" in conversation. Only one of them changes the pixel grid, and that is the one that decides how big the file can ever be.
| Operation | What changes | What stays the same | When it is the right move |
|---|---|---|---|
| Resize | Width and height in pixels | Bytes per pixel, format | The dimensions are wrong for the slot |
| Compress | Bytes, by throwing away detail | Pixel dimensions | Dimensions are right but the KB limit is not |
| Crop | Which pixels survive | Resolution of what is left | The aspect ratio is wrong, not the size |
| Convert | How pixels are stored | Dimensions, usually quality | The portal accepts JPG only, or you want WebP |
A 4000x3000 photo holds 12 million pixels. Blown up to fill a 1080px Instagram post, roughly 90% of them are thrown away. Those pixels are the file: the same source measured 12KB at 200x230 and 184KB at 1920x1080, both at quality 90 (table in section 5). Resize first and every later step, compression included, has less work to do.
The one direction that does not work is up. Enlarging invents pixels from neighbours, so a 200px thumbnail "resized" to 2000px is a blurry 2000px file, not a detailed one. If enlargement is genuinely the job, that is the upscaler guide, which uses a different class of model.
Pick the job, get the settings
Every resize is the same five decisions: pixels, fit mode, format, quality, and whether the metadata matters. Here is what those decisions are for the jobs people actually do.
| Job | Pixels | Fit | Format and quality | What you get (measured) |
|---|---|---|---|---|
| Instagram post | 1080 x 1350 | Cover | JPEG 90 | 138 KB |
| Instagram story | 1080 x 1920 | Cover | JPEG 90 | 171 KB |
| X / Twitter post | 1200 x 675 | Cover | JPEG 90 | 100 KB |
| YouTube thumbnail | 1280 x 720 | Cover | JPEG 85 | 84 KB |
| Bank form photo | 200 x 230 | Cover | JPEG 90 | 12 KB |
| 4x6 inch print | 1200 x 1800 | Cover | JPEG 95 | 273 KB |
| Email header | 600 x 300 | Cover | JPEG 85 | 26 KB |
Resize, crop if the ratio is wrong, then compress, then convert. Compressing before resizing throws away detail you were about to delete anyway, and converting last means the encoder sees the final pixel count. Resizing 4000x3000 down to 1080x1350 removes about 88% of the pixels before compression starts.
Exact platform dimensions
The pixels each platform wants on upload, not the size it happens to display. Checked against each platform's own help pages in November 2026.
| Platform and slot | Upload pixels | Ratio | Note |
|---|---|---|---|
| Instagram feed, square | 1080 x 1080 | 1:1 | Anything wider gets downscaled on upload |
| Instagram feed, portrait | 1080 x 1350 | 4:5 | Tallest shape the feed shows; fills more of a phone screen than square |
| Instagram story and reel cover | 1080 x 1920 | 9:16 | Keep text inside the middle 60%: the UI covers the top and bottom |
| Instagram profile picture | 320 x 320 | 1:1 | Cropped to a circle, so leave margin around the face |
| Facebook link or post image | 1200 x 630 | 1.91:1 | The 1.91:1 crop is what appears in the feed |
| X / Twitter in-stream photo | 1200 x 675 | 16:9 | X re-compresses hard; upload at final size, not larger |
| X / Twitter header | 1500 x 500 | 3:1 | Profile picture overlaps the lower left corner |
| YouTube thumbnail | 1280 x 720 | 16:9 | Platform cap is 2MB; check it at sidebar size before uploading, because that is where it has to be readable |
| YouTube channel banner | 2560 x 1440 | 16:9 | Only the central 1546 x 423 area is guaranteed visible on TV, desktop and phone |
| LinkedIn shared image | 1200 x 627 | 1.91:1 | Same ratio as Facebook, same crop behaviour |
| LinkedIn profile banner | 1584 x 396 | 4:1 | Very wide; text left-aligned survives the mobile crop |
| Pinterest standard pin | 1000 x 1500 | 2:3 | Tall pins take more vertical space in the grid |
| TikTok video cover | 1080 x 1920 | 9:16 | Same safe-zone rule as an Instagram story |
| Amazon main product image | 2000 x 2000 | 1:1 | Zoom needs the longest side at 1000px or more; product should fill about 85% of the frame |
| Shopify product image | 2048 x 2048 | 1:1 | Shopify's own recommendation; larger files get resized by the CDN anyway |
| Etsy listing photo | 2000 x 2000 | 1:1 or 4:3 | Etsy asks for at least 2000px; the first photo needs 635px minimum or it ranks lower |
| Print 4x6 photo | 1200 x 1800 | 2:3 | At 300 DPI; section 8 covers other print sizes |
| Email body image | 600 wide | Any | 600px is the width most clients render; serve 1200px for Retina and set width=600 in the HTML |
These are the upload sizes the platforms document, and they do change without notice: Etsy replaced its old 2700px advice with a 2000px minimum, and SSC now captures the candidate photo live in several 2026 forms. When a portal prints a number in its own notification, that number wins over anything on this page.
Cover, Contain, Stretch
Three buttons, three completely different results. This is the setting that quietly ruins more photos than quality ever does.
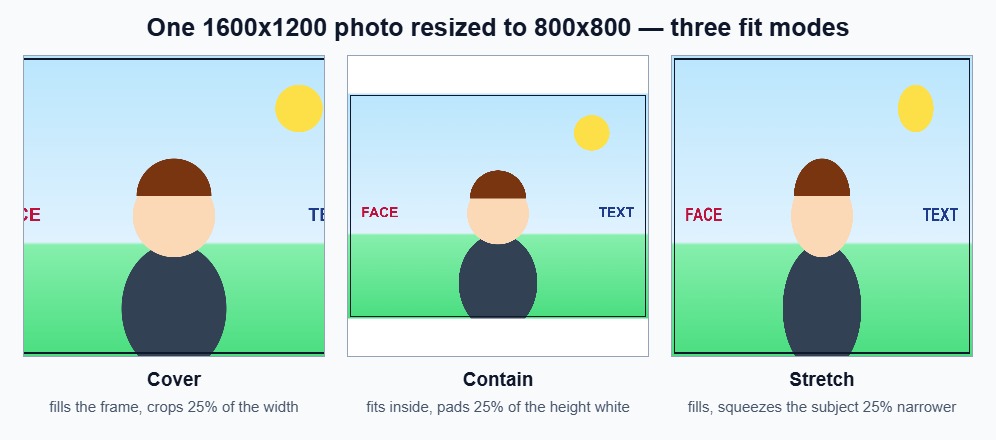
The arithmetic for a 1600x1200 photo in a 1080x1080 frame is worth knowing, because it explains what you lose before you press the button:
| Mode | What it does at 1600x1200 into 1080x1080 | What you lose | Use it for |
|---|---|---|---|
| Cover | Scales to 0.9 and keeps the centre 1200 x 1200 of the source | 400px of width, 25% of the frame | Feed posts, exam photos, product shots, any slot where the edges are background |
| Contain | Scales to 0.675 and pads the rest with the background colour | Nothing, but 270px of height becomes padding | Logos, diagrams, scans where the whole page matters |
| Stretch | Scales width by 0.675 and height by 0.9 | Proportion: faces and circles become 25% narrower | Nothing in this guide. Only when the source ratio already matches |
The safe zone follows from the same arithmetic. If the subject has to survive, it must sit inside the area Cover keeps: for 4:3 into 1:1 that is the central 75% of the width. A 3:2 photo into 9:16 is far harsher, only about 38% of the width survives, which is why a horizontal photo makes a bad reel cover.
Hit an exact KB target
Forms and upload boxes ask for kilobytes, not pixels, and the two limits are not independent: the pixel count sets a ceiling that quality alone cannot break. These are real outputs from this tool, not estimates.
Test A is a 4000x3000 photo-like JPEG (1.1MB) with texture and hard edges. Test B is a studio-style portrait on a near-white wall (2000x2300, 109KB), the kind of photo a passport or exam form actually wants. Both were resized in Chrome with the tool's own controls.
| Output size | Quality 90 | Quality 80 | Quality 70 | Quality 60 |
|---|---|---|---|---|
| Test A 200 x 230 | 12 KB | 8 KB | 7 KB | 6 KB |
| Test A 350 x 450 | 28 KB | 19 KB | 16 KB | 13 KB |
| Test A 600 x 600 | 54 KB | 37 KB | 29 KB | 24 KB |
| Test A 1080 x 1080 | 128 KB | 86 KB | 68 KB | 56 KB |
| Test A 1080 x 1350 | 138 KB | 93 KB | 73 KB | 61 KB |
| Test A 1920 x 1080 | 184 KB | 122 KB | 95 KB | 79 KB |
| Test B, plain portrait | Quality 90 | Quality 95 | Quality 100 | PNG | WebP 90 |
|---|---|---|---|---|---|
| 200 x 230 | 5 KB | 7 KB | 14 KB | 17 KB | 3 KB |
| 350 x 450 | 9 KB | 12 KB | 28 KB | 42 KB | 5 KB |
| 600 x 600 | 15 KB | 34 KB | 54 KB | 88 KB | 9 KB |
Read the two tables together and the rule is obvious. Each 10 points of quality is worth roughly 20 to 30% of the file, and every format switch is worth more than that. Going from 1080x1350 at quality 90 (138KB) to quality 80 (93KB) is one slider move. Going from JPEG 90 to WebP 90 at the same size is usually the bigger win, at the cost of a format some portals reject.
Bank and SSC forms often say "20KB to 50KB". At 200x230 a clean portrait lands at 5KB at quality 90 and peaks around 14KB at quality 100; even a busy, textured photo only reached 12KB at quality 90. No quality setting reaches 20KB, because 46,000 pixels cannot hold that much JPEG data. If a portal enforces the floor and refuses the file, the pixel count or the form's stated range is wrong, not your photo. Check the notification, and check the next section.
Resize to the pixels first, never the reverse
Set width and height to the exact numbers the target prints, and let the fit mode decide what happens to the edge that does not fit. A correctly sized photo is already most of the way to its KB band: 200x230 tops out at 14KB, 350x450 at 28KB, 1080x1350 at 138KB.
Step quality down in tens, not ones
Export at 90, then 80, then 70. Two or three exports bracket almost any limit, because each step is a 20 to 30% change. A 100KB ceiling at 1080x1350 sits between 80 (93KB) and 90 (138KB); at 1920x1080 it sits near 70 (95KB).
Never upscale to grow a file
If the file is under a minimum, adding pixels only adds blur and usually still misses the floor. The honest options are a larger source, a higher quality, or a different pixel count that the form allows. A 350x450 portrait measured 28KB at quality 100, inside most bands; an upscaled 200x230 is neither bigger nor sharper.
Need a target the tool does not print? The compressor guide covers hitting a byte target directly, and the image compressor does it without changing dimensions — useful when the pixels are fixed and only the bytes are wrong.
Exam and passport photos
Government portals publish two numbers that have to be met at the same time: pixels and kilobytes. Most rejections come from meeting one and missing the other.
The figures below come from the IBPS application guidelines PDF and the sizes the portals print in their own forms. They are not interchangeable between exams: a photo that satisfies a bank form can fail an SSC form in the same cycle, because SSC now captures the candidate's photograph live inside the application for several exams and only uploads a signature.
| Slot | Pixels | File size | What the portal prints |
|---|---|---|---|
| IBPS / bank photo | 200 x 230 | 20 to 50 KB | JPEG only, plain light background, face clearly visible |
| Signature | 140 x 60 | 10 to 20 KB | Black or dark blue ink on white paper, running hand, not capitals |
| SSC 2026 signature | about 708 x 236 | 10 to 20 KB | Approx. 6.0 x 2.0 cm at 300 DPI; photo captured live in the form |
| UPSC square photo | 350 x 350 | Check the notification | 1:1, face centred, plain background |
| Passport photo | 350 x 450 | 20 to 100 KB | 35 x 45 mm at about 254 DPI, which is exactly 350 x 450 |
A 140x60 signature rendered from a clean scan measured 2KB at quality 90 and 3KB at quality 100 — under a 10KB floor, so the portal reports "file too small". The same signature at 708x236 measured 9KB at quality 90 and 14KB at quality 100, inside the band. If the form fixes 140x60 and 10KB at the same time, the two rules contradict each other: use the dimension the notice actually prints, and keep the scan's paper texture rather than cleaning it to pure white.
All five slots are one-click presets in the AFFLIGO image resizer. Pick the preset, upload, and export JPEG. If the portal also prints a KB range, section 5 has the quality steps that land inside it.
Why portals reject the file
Six messages, six different causes. Most people fix the wrong one because the message names the symptom, not the setting.
| What the portal says | What actually happened | The fix |
|---|---|---|
| "Image dimensions are incorrect" | You uploaded 350x450 into a field that wants 200x230, or let a phone crop change the ratio | Type the two numbers the notice prints, aspect lock off, fit mode Cover |
| "File size exceeds 50KB" | Quality is set for looks, not for the limit | One step down in quality (90 to 80) usually cuts 20 to 30%; only shrink pixels if that is not enough |
| "File size below 20KB" | The pixel count is too small to hold that many bytes, not a settings mistake | Re-read the notice: at 200x230 the ceiling is about 14KB. Use the size the notice prints and check whether the range really applies to that slot |
| "Only JPG or JPEG files are allowed" | The file is PNG, WebP, or HEIC renamed to .jpg, which does not change the encoding | Re-export as JPEG from the resizer; rename never works |
| "Signature is blurred or miniature" | A 140x60 slot destroys handwriting, and a 2KB scan leaves nothing to show | Scan at 600 DPI, crop tight to the strokes, resize to the printed size, keep the paper grain |
| "Photograph has a dark or patterned background" | The rule is about the wall behind you, not the file | Reshoot against a plain light wall; no resizer setting can rescue it |
Print size and DPI
DPI is not detail. It is a note pinned to the file that says how large to print each pixel, which is why the same 3000px image is a 10-inch print or a 40-inch poster depending on one number.
The only formula you need is pixels = inches x DPI, and its inverse inches = pixels / DPI. A 4x6 inch print at 300 DPI is 1200 x 1800 pixels. A 3000px photo prints at 10 inches wide at 300 DPI, or 15 inches at 200 DPI with slightly softer detail. When a site tells you to "set 72 DPI for web", it is repeating a myth: a browser renders a 1080px image at 1080 CSS pixels regardless of the DPI tag, and changing the tag changes nothing about the file's bytes or its sharpness.
| Print product | Size (inches) | Pixels at 300 DPI | Pixels at 200 DPI |
|---|---|---|---|
| Business card | 3.5 x 2 | 1050 x 600 | 700 x 400 |
| Photo print 4x6 | 4 x 6 | 1200 x 1800 | 800 x 1200 |
| Photo print 8x10 | 8 x 10 | 2400 x 3000 | 1600 x 2000 |
| Flyer A5 | 5.8 x 8.3 | 1748 x 2480 | 1165 x 1654 |
| Poster A3 | 11.7 x 16.5 | 3508 x 4961 | 2339 x 3307 |
| Poster A2 | 16.5 x 23.4 | 4961 x 7016 | 3307 x 4677 |
Phone cameras make this easy to check before you pay for a print. The sensor's megapixel count divides down to a maximum print size, and no resizer can beat it:
| Phone output | Pixels | Largest print at 300 DPI | Largest print at 200 DPI |
|---|---|---|---|
| 12 MP | 4032 x 3024 | 13.4 x 10.1 in | 20.2 x 15.1 in |
| 48 MP | 8064 x 6048 | 26.9 x 20.2 in | 40.3 x 30.2 in |
| 108 MP | 12000 x 9000 | 40 x 30 in | 60 x 45 in |
300 DPI is the safe default for anything held in the hand; 150 to 200 DPI is acceptable for posters viewed from a metre away. Under 150 DPI individual pixels become visible, and upscaling does not fix it because interpolation adds no real detail. Start from the largest original you have, and set the print size from the pixel count rather than the other way round.
Web delivery in one screen
Everything a page needs from an image, without the front-end lecture.
Serve the width the layout uses, doubled for sharp screens. Find the rendered width in DevTools, multiply by 2 for Retina and 3x phones, and export that. A 600px-wide content column wants a 1200px file; that is the whole 2x rule. For fluid layouts, export 400, 800 and 1200px versions and let srcset pick, so a phone downloads the 400px file instead of the 1200px one. MDN's responsive images guide covers the markup, and this page is about the pixels.
Then pick the format by what is in the picture. Photos go out as JPEG at 85 to 90 quality, or WebP where every target browser accepts it: at the same 200x230 the WebP was 3KB against 5KB for JPEG. Flat graphics, logos and anything with transparency stay PNG. Choose AVIF only with a JPEG fallback, and never GIF for a photo, because its 256 colours band the sky into stripes.
| What you are shipping | Format | Starting quality | Target weight |
|---|---|---|---|
| Hero or banner photo | WebP, JPEG fallback | 80 | Under 200 KB |
| In-article photo | WebP | 80 | Under 100 KB |
| Product or thumbnail grid | WebP | 75 | Under 60 KB |
| Logo, icon, screenshot with text | PNG | Lossless | As small as it goes |
| Email body image | JPEG | 85 | Under 200 KB, 600px wide |
Email is the one place where the old advice still holds: most clients render a 600px-wide body, so serve a 1200px image and set width="600" in the HTML. A 600x300 header measured 26KB at quality 85, comfortably inside every client's limit.
Batch resizing
Twenty files, one set of settings, one ZIP. Measured at 18 seconds on a four-core desktop, which is roughly 0.9 seconds per photo.
Group by orientation before you drop
Cover crops the long edge, so mixing portraits and landscapes in one run produces one group with cut heads. Run portraits first, then landscapes, or pad the odd ones with Contain.
Test five, then run the rest
Process five representative files and check the crop and the KB range. In our 20-file run every output landed on the same 92KB at 1080x1080 and quality 85, so a sample of five would have caught a wrong setting before the other fifteen.
Use the queue, not twenty tabs
The queue accepts fifty files at once, applies one set of dimensions to all of them, and packs the results into a single ZIP. Twenty 1600x1200 photos at 284KB each came out as 1.8MB total, 68% smaller, in one download.
Terminal, only if it repeats
If this is a monthly job rather than a one-off, ImageMagick does the same thing in one line: magick mogrify -resize 1080x1080^ -gravity center -extent 1080x1080 -quality 85 *.jpg. The ^ and -extent pair is what reproduces Cover; a plain -resize in a square box gives you Contain, with bands.
Metadata and privacy
Two things happen to a photo when it is resized in a browser, and both are worth knowing before you upload a form photo: the GPS tag disappears, and the file never leaves the machine.
Phone photos carry an EXIF block: camera model, orientation, timestamp, and often GPS coordinates accurate to a few metres. A resizer that re-encodes the image through a canvas writes a brand new file from the decoded pixels, so the old metadata block is not copied across. That is not a privacy feature bolted on afterwards; it is a side effect of how browser image processing works, and it applies to any canvas-based tool, not only this one.
| Test | Input | Output | Result |
|---|---|---|---|
| EXIF APP1 marker | 284 KB JPEG with camera EXIF and GPS | 84 KB JPEG from the resizer | Gone — no Exif marker in the output bytes |
| XMP block | Same file, XMP packet present | Same output | Gone — no Adobe XMP namespace found |
| Network requests carrying the image | One 1.1 MB photo | Full resize and download | None — six GET requests fired, zero bytes sent, because the file is decoded with createImageBitmap and encoded with canvas.toBlob |
The practical consequence cuts both ways. For a form photo or a public listing, losing GPS and the camera serial is exactly what you want. For a print master or an archival copy, it is data loss: the ICC profile and the capture timestamp go with it, which is why you keep the original and resize a copy rather than overwriting it.
On Windows, right-click the photo, open Properties, and read the Details tab. On macOS, open it in Preview and press Cmd+I. If you see GPS coordinates on a photo you are about to post publicly, strip them with any resize, or with the metadata-removal step built into most phone share sheets.
What this tool will not do
Read this before you blame the output. These are the boundaries of a browser-based resizer, stated plainly, because most resize complaints are one of them.
| Limit | What it means in practice | The workaround |
|---|---|---|
| JPEG, PNG and WebP only | HEIC from an iPhone, AVIF, TIFF and RAW are not decoded by the input field | Export a JPEG from the phone first (Photos app: Share, Save as JPEG), or convert with the image converter |
| Output is JPEG, PNG or WebP | No AVIF, no TIFF, no PDF wrapper | None here; AVIF is a separate encode step and buys little once the pixels are already 1080px wide |
| 50 files per run | The 51st file in a drop is ignored, with a toast, not an error | Split into runs of fifty; the settings stay put between runs |
| 1 GB per file | Anything larger is refused before decoding, to protect the tab | Reduce the file in an editor first; no browser can hold that decode in memory |
| 10,000 px per side | The width and height fields accept up to 10000, and a single canvas that large is already at the edge of what a browser will allocate | A screen never needs more. For a poster-size banner, tile the artwork or use a print pipeline |
| No algorithm picker | All resizing goes through one canvas draw per image, with the browser's own resampling. There is no Lanczos or Bicubic dropdown to set | If you need to choose a kernel, use ImageMagick or a desktop editor; for downscaling to web sizes the difference is hard to see |
| One setting for the whole batch | All files in a run share dimensions, fit mode, format and quality | Group by shape first; run portraits, then landscapes |
| No sharpening pass | Downscaling softens detail slightly and the tool does not add an unsharp mask | Accept it at 1080px, or sharpen in an editor when a print depends on it |
Everything above is a deliberate trade for privacy and for working on a phone: nothing is uploaded, so the browser has to do the decoding itself, and a browser tab is not a print pipeline. For a photo going into an Instagram post or a bank form, the limits never come into play.
Mistakes that cost quality
Six habits, ranked by how much they actually hurt, with the measured difference between the wrong move and the right one.
| Mistake | What it costs | Do this instead |
|---|---|---|
| Compressing before resizing | Detail thrown away twice, and the first pass had 12 million pixels to damage | Resize to the target pixels, then set quality. Resizing 4000x3000 to 1080x1350 already removes about 88% of the pixels |
| Re-saving the same JPEG | Generation loss compounds; each pass re-quantises every block | Keep the original and resize a copy. If you must repeat, start again from the original |
| Upscaling to reach a KB floor | Adds interpolated blur and often still misses the floor | Re-read the notice, pick a pixel size the form allows, or start from a bigger source |
| Stretching a photo into a different ratio | Faces 25% narrower when 4:3 goes into 1:1; instantly noticeable | Cover with the subject centred, or Contain when the whole frame matters |
| Resizing with CSS only | A 4000px file still downloads in full for a 400px slot | Export the width the layout renders, doubled for sharp screens |
| Uploading a PNG where JPEG is required | The portal rejects it, or the file is 3x heavier for the same photo | Re-export as JPEG in the resizer. Renaming the extension changes nothing |
A 1080x1350 JPEG at quality 90 measured 138KB, and the same pixels at quality 80 measured 93KB — a third of the file for a difference most people cannot see on a phone. The same effect runs in reverse at small sizes: a 200x230 portrait went from 5KB at quality 90 to 14KB at quality 100, nearly three times the bytes for detail that 46,000 pixels cannot show.
Step-by-step workflow
Measure the slot, type the pixels, choose the fit, set quality, download — five moves in the order that wastes the fewest bytes.
Find the target pixels
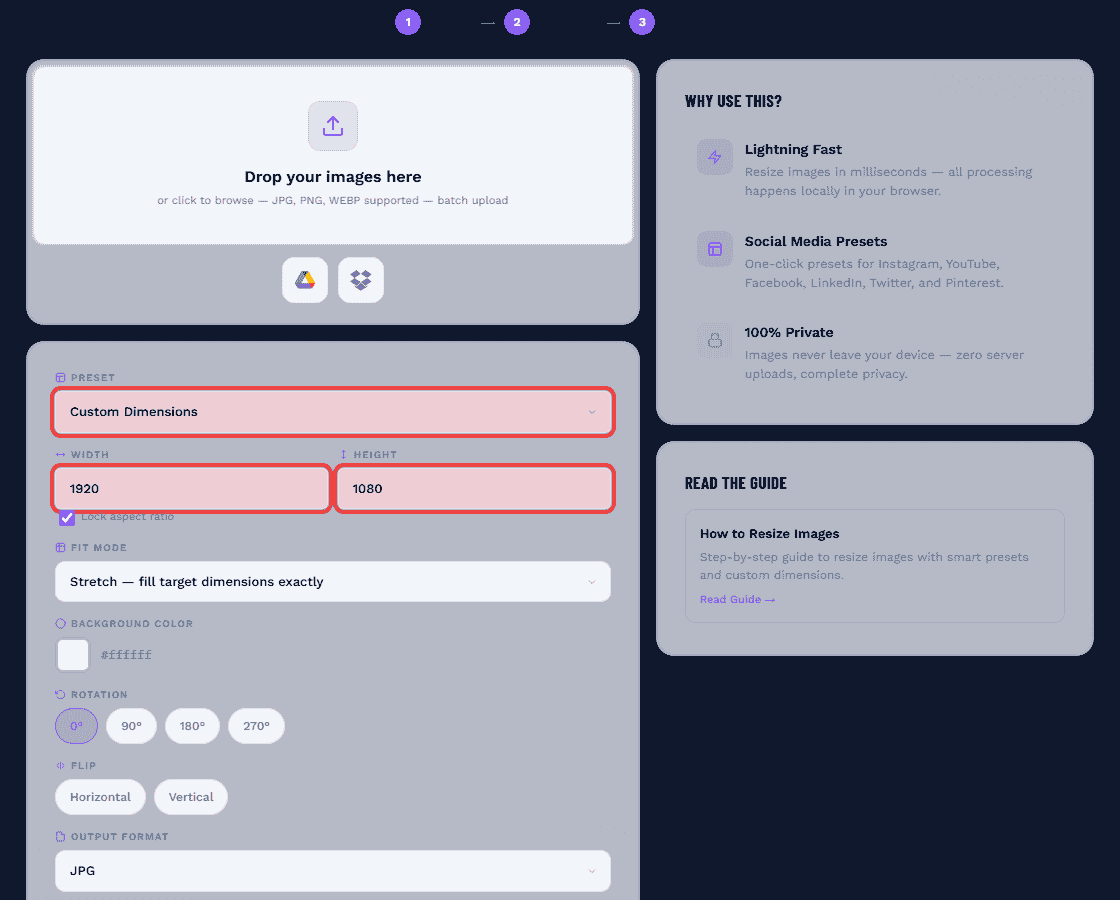
Read the number off the platform's own help page or the form's notification (section 3 and section 6 hold the current values). For print, multiply inches by 300. Write down both numbers before opening the tool: width x height, nothing else.
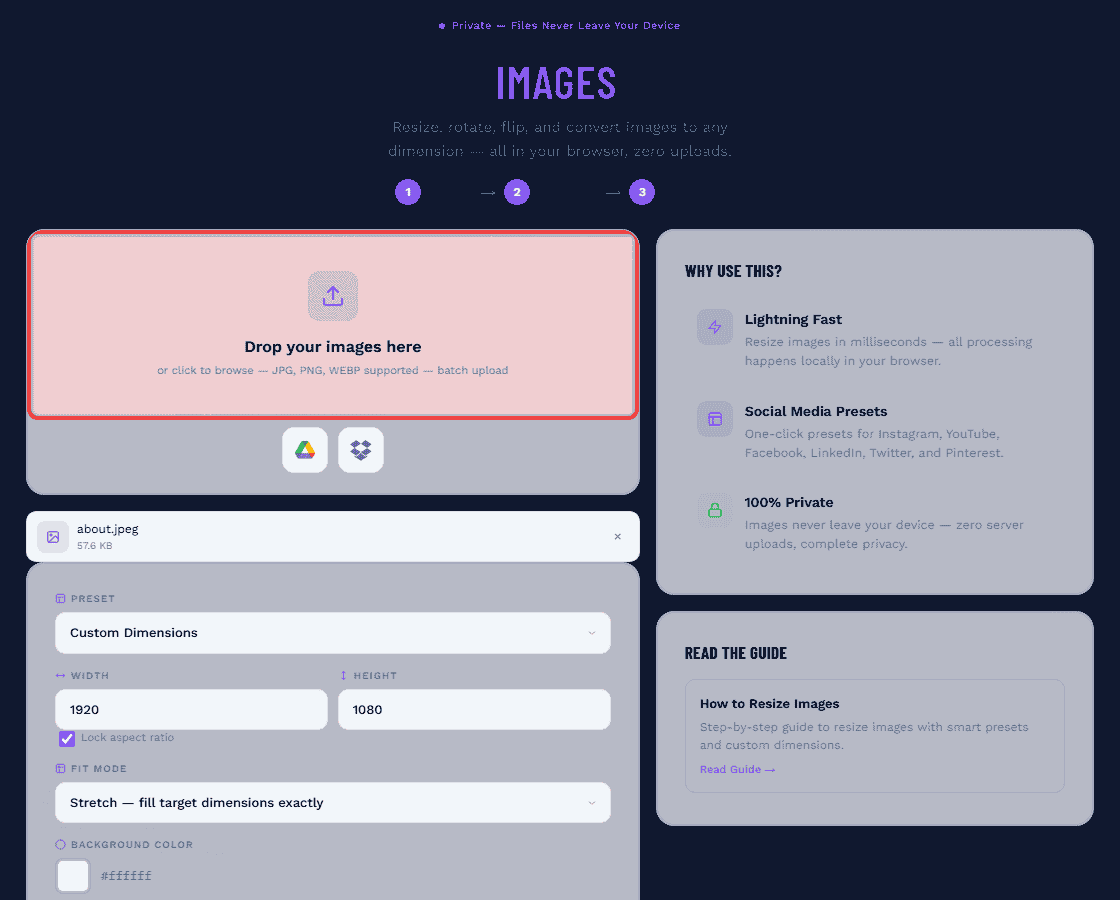
Select best source image
Always start from the largest, highest-quality source available. RAW files are ideal. High-res JPEG at 100% quality works well. Never resize from an already-compressed or previously resized image.
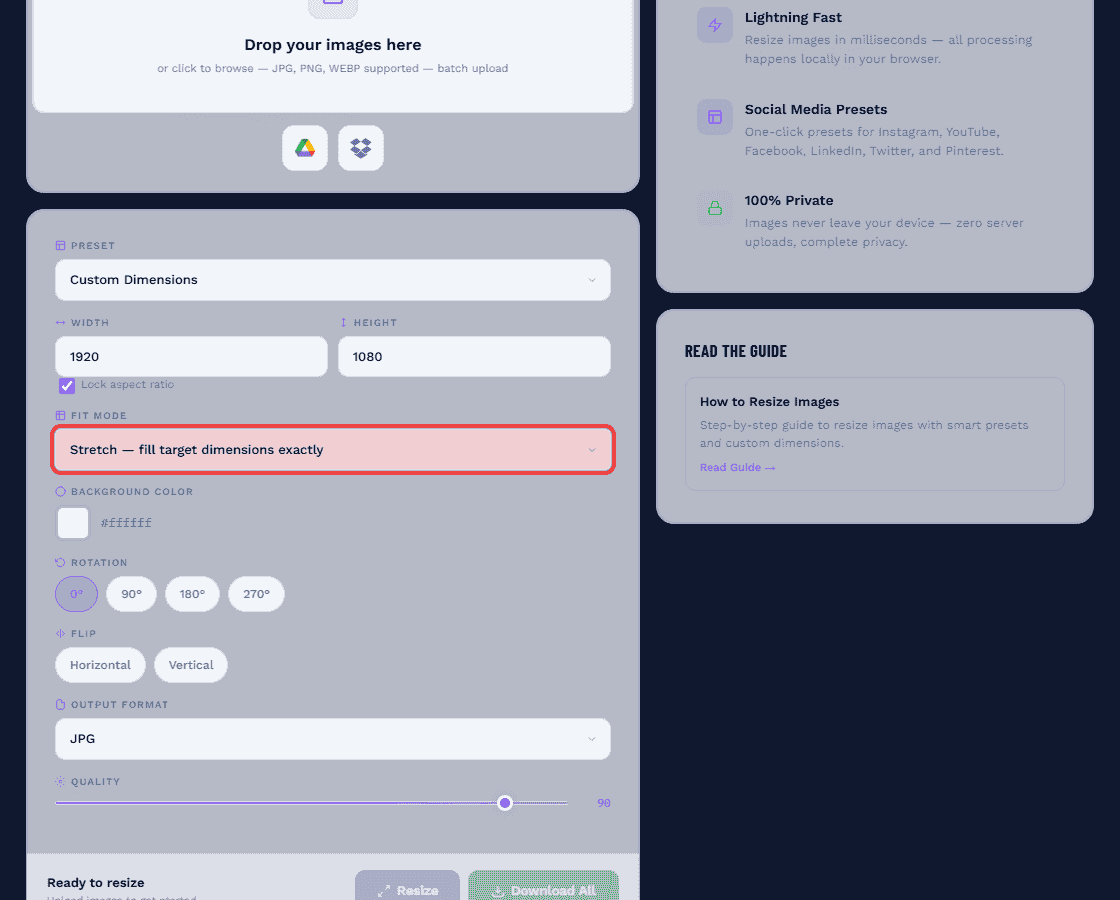
Choose the fit mode and the quality
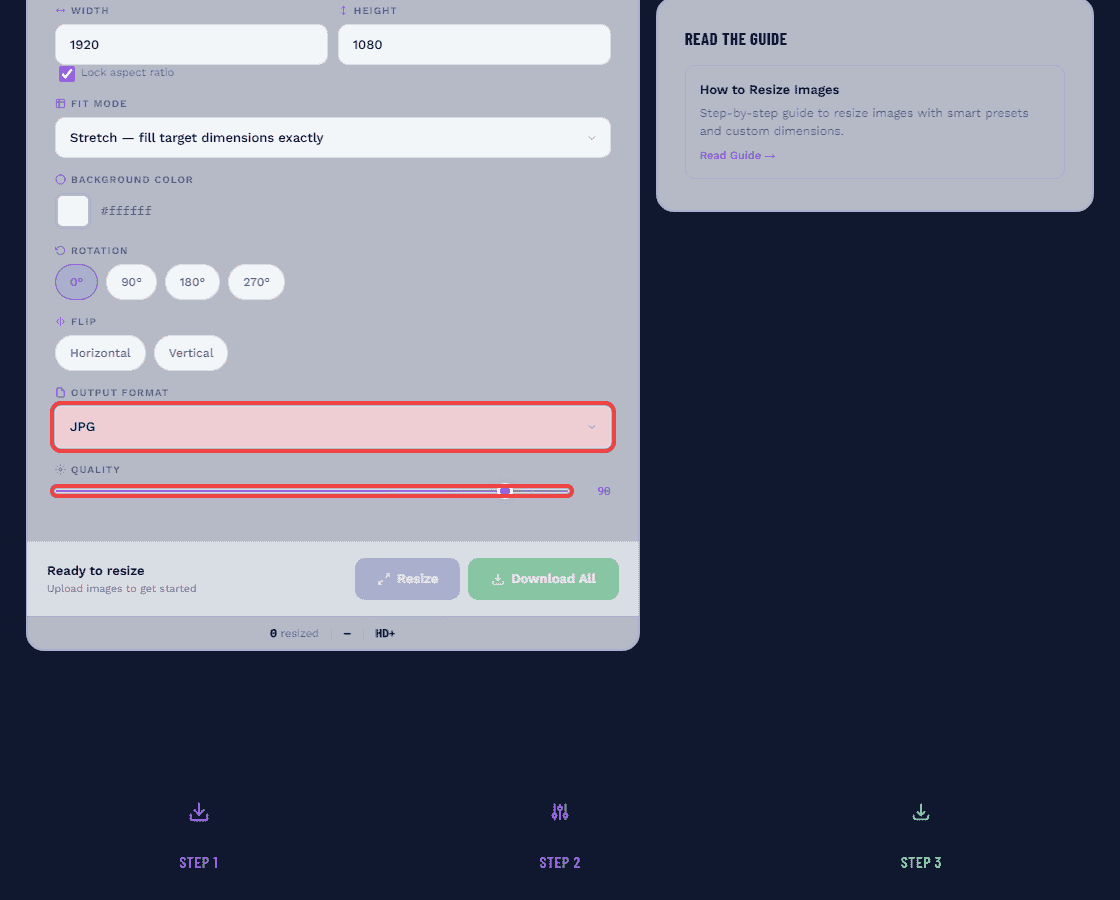
Fit: Cover for feed posts, exam photos and product shots; Contain for logos, scans and diagrams; Stretch only when the source ratio already matches. Quality: start at 90, then step to 80 and 70 if the file misses the limit. There is no algorithm dropdown in this tool — the browser handles resampling, and the fit mode is the setting that visibly changes the output.
Export, and know what the export costs
- Format: JPEG for photos, PNG for transparency, WebP for the web when the destination accepts it
- Quality: 90 to start; 80 when the limit is tight; below 70 only for thumbnails
- Colour: the output is sRGB, because the canvas encodes it that way. Print CMYK is a job for a desktop editor
- Metadata: always stripped. Keep the original if the capture details matter (section 11)
Check the crop, then the KB
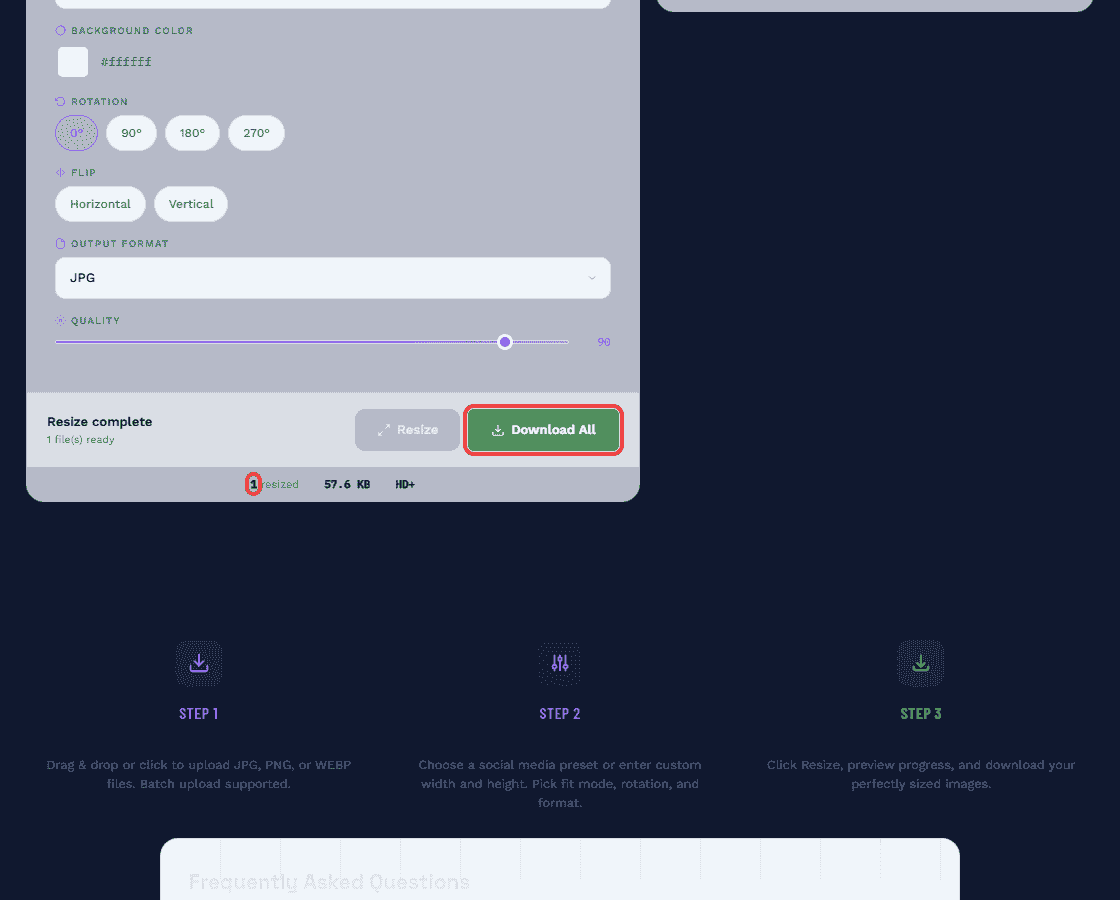
Look at the preview at the output size: is the face inside the frame, is any text cut, are the corners still clean? Then read the file size the queue prints. In a 20-file run all outputs landed on the same 92KB, so one glance at the first result tells you whether the setting is right for the other nineteen.
Frequently asked questions
Eleven questions, answered with the measurements behind them rather than the usual advice.
Because 46,000 pixels cannot hold that many JPEG bytes. A clean portrait measured 5KB at quality 90, 7KB at 95 and 14KB at 100; a busy textured photo peaked at 12KB at quality 90. If a form demands 200x230 and a 20KB floor at the same time, no export satisfies both — the pixel size and the range contradict each other. Re-read the notice and use the dimensions it actually prints.
Resize first, then step quality in tens: 90, 80, 70. Each 10 points is worth roughly 20 to 30% of the file. A 1080x1350 photo measured 138KB at 90, 93KB at 80 and 73KB at 70; a 1920x1080 photo measured 184KB, 122KB and 95KB at the same settings. A 100KB ceiling at 1080x1350 sits between 80 and 90, so two exports bracket it.
Cover for feed posts, exam photos and product shots, because the edges are usually background. Contain for logos, scans and diagrams where the whole frame matters — it pads instead of cutting. Stretch only when the source ratio already matches the target, otherwise it squeezes the subject: a 1600x1200 photo forced into 800x800 comes out 25% narrower.
Instagram feed 1080x1350 portrait or 1080x1080 square, story and reel cover 1080x1920. X in-stream photo 1200x675, header 1500x500. YouTube thumbnail 1280x720, channel banner 2560x1440. Facebook and LinkedIn link images 1200x630 and 1200x627. Pinterest 1000x1500. Upload at those sizes rather than larger, because each platform re-compresses on arrival.
Match the pixel size to the slot before touching quality. A clean 140x60 scan rendered 2KB at quality 90 and 3KB at 100, which misses a 10KB floor; the same signature at 708x236 measured 9KB at 90 and 14KB at 100, inside the band. Keep the scan's paper texture too: a grainy version at 708x236 quality 100 reached 71KB, so the 10 to 20KB band sits in the middle of that range and quality alone can land in it.
Yes. A 284KB JPEG with camera EXIF and a GPS block came out as an 84KB file with no Exif marker and no Adobe XMP packet. The output is re-encoded from decoded pixels, so the old metadata block is not carried across. That is good for a public post and bad for an archival copy, which is why you keep the original.
No. The file is decoded and re-encoded inside the browser tab, and a 1.1MB test photo produced no network request containing the image. The trade-off is that the browser does the work, which is why there are caps on file size and pixel count.
Almost always because the source was smaller than the output, or because the file had already been re-saved several times. Enlarging invents pixels from neighbours and adds no detail. Downscaling from a 12MP original to 1080px is sharp; enlarging a 500px thumbnail to 2000px is not, whatever tool you use.
Not in this tool — the input accepts JPEG, PNG and WebP. Export a JPEG from the Photos app first (Share, then Save as JPEG, or change the camera setting to Most Compatible), then resize. Renaming a .heic file to .jpg does not change the encoding and the browser will still not decode it.
Fifty per run, up to 1GB per file and 10,000 pixels per side. One setting applies to the whole batch: twenty 1600x1200 photos at 1080x1080 quality 85 took 18 seconds, about 0.9 seconds each, and came out 68% smaller in a single ZIP. Group by orientation first, because Cover crops the long edge of every file the same way.
DPI is a tag, not detail: it changes the printed size, never the pixels. The formula is pixels = inches x 300, so a 4x6 inch print needs 1200x1800 pixels and an 8x10 needs 2400x3000. A 4032x3024 phone photo prints 13.4 x 10.1 inches at 300 DPI and 20.2 x 15.1 inches at 200 DPI. Setting a 1080px web image to 300 DPI does not make it printable at 4x6.
Want to explore more?
Key Takeaways
- Set the pixels first: 1080x1350 for an Instagram post, 1200x675 for X, 1280x720 for a YouTube thumbnail, 200x230 for a bank form, 1200x1800 for a 4x6 inch print.
- Quality is the only lever for file size. At 1080x1350, quality 90 measured 138KB and quality 80 measured 93KB — each 10 points is worth roughly 20 to 30%.
- The pixel count sets a ceiling that quality cannot break. A 200x230 photo peaks around 14KB, so a 20KB floor cannot be met at that size.
- Fit mode changes the picture more than quality does. Cover removed 25% of the width going from 4:3 to 1:1; Stretch made the subject 25% narrower.
- Resizing strips EXIF and GPS, because the output is re-encoded from pixels. Keep the original if the capture data matters.
- Batch runs take 50 files at one setting: twenty 1600x1200 photos took 18 seconds and came out 68% smaller.
Every figure in this guide comes from running the tool, not from estimating. Chrome 157 headless on Windows, 4 cores and 8GB of memory, on 4 November 2026. The fixtures were a 4000x3000 textured JPEG (1.1MB), a 2000x2300 studio-style portrait on a near-white wall (109KB), a 2000x850 signature scan (45KB) and a grainy variant of it (711KB). Each resize used the page's own controls and the output size was read from the queue. The harness is tests/irs-lab.js and the raw output is tests/irs-lab-tmp/results.json, so any number here can be reproduced.
- IBPS application guidelines: photo 200x230 at 20 to 50KB, signature 140x60 at 10 to 20KB, JPEG only (checked October 2026).
- SSC 2026 notifications and application forms: signature about 708x236 at 10 to 20KB, photograph captured live in several exams (checked October 2026).
- Etsy Help, Requirements and Best Practices for Images in Your Etsy Shop: 2000px minimum, 635px for the first photo.
- MDN, Responsive images: srcset and sizes behaviour.
- Instagram, YouTube, X, LinkedIn and Pinterest help pages for the upload sizes in section 3 (checked November 2026).

Karan Kumar


